I am working on two weeks of Disney withdrawal. I don't even have all of my pictures sorted.
What
I loved the most this time was character meet and greets. Being an
adult, I never got into the idea that I had to run around on a character
hunt just to stand in line and get a picture. Well somehow, someone
at Disney must have realized that Character pictures are cool because
between 2007 and two weeks ago, Disney completely changed character
encounters inside the parks.
There is always character dining,
which is a good way to see characters, especially some of the harder
ones. With the Disney Dining Plan it is not hard to do and it doesn't
seem as expensive. Yes you pay but with the dining plan you pay 25%
less b/c you pay up front. This trip we did the O'hana Breakfast with
Lilo & Stitch, Chef Mickeys and the Garden Grill. For those that
don't know, I am a monstrous Stitch Fan and I was so worried I would get
passed over for being an adult, I told my server about it. She laughed
at me and said, he will stop at every table, no worries. I could have
come straight home I was so happy about Stitch. But then it was only
Tuesday.
The Disney Mobile app for Verison phones helped a lot.
You could look up your characters and find out where they were
appearing. What part of the park and how long they would be there. You
have to be a Verison Customer to use it, I think but it worked well,
especially with que wait times. (More on this later)
Taking their
queue from Mickey's Toon Town Fair (now closed) in EPCOT there is now
the EPOCT Character Spot. A place where you can meet 5 classic
characters (Mickey, Minnie, Donald, Goofy and Pluto) get your pictures
take with either your own camera or with Photo Pass and get autographs.
It is inside and cool. The characters have their own backgrounds and
each station has a photo pass photographer. It is of course targeted at
kids but enough adults go through that they don't think you have lost
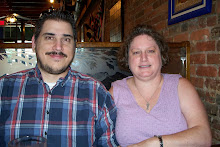
your mind. It was so fun even David got in the pictures.
The
characters that seemed the most popular with adults where Phineas and
Ferb in Hollywood studios. We found their appearance on the mobile app
and their que did not seem too long. Standing listening to the music
and watching the encounters in front of us, we realized that the adults
out numbered the kids by a wide margin. Funny.
I did use my autograph book but only at character dinning. It just seemed cumbersome any other time.
To
recap: We saw Phineas and Ferb, Mickey (x3), Minnie (x2), Pluto (x2),
Goofy (x2), Donald (x2), Pooh, Daisy, Lilo, Stitch (x2), Chip and Dale,
Baloue, King Louie and Marie (from the Aristocats).
Weird side note - the character spots in the World Showcase did not have photopass photographers.
Tuesday, May 8, 2012
Sunday, April 1, 2012
TARDIS Card
For a long time, I have wanted to do some Fandom Cards. Several years ago, I made some Twilight and Harry Potter cards for the Young Adult Literature Track Craft Hour. The time is right do some additional cards. This weekend, I made this:

More to come.

More to come.
Wednesday, March 28, 2012
Exercise the Craft Demon
Sometimes I get an idea for a craft and I have to work it out! I have been trying to come up with unique different ideas to help a friend promote her book. Just something unexpected. Janine Spendlove sent me some promotional post cards for her books. What can I do with these, other than pass them out to my friends? I can do this:
1. Lay the post cards out randomly on a scanner and scan them to make one sheet of paper and print.

2. Use that scanned print for the cover paper on an altered composition book


Some how the postcards don't look as random as they did on the scanner bed. I will have to fix that next time.
1. Lay the post cards out randomly on a scanner and scan them to make one sheet of paper and print.

2. Use that scanned print for the cover paper on an altered composition book


Some how the postcards don't look as random as they did on the scanner bed. I will have to fix that next time.
Saturday, January 21, 2012
DIY Disney Autograph Book


Methodology: Make an inexpensive book for Disney Characters to sign, that can be disassembled after the vacation for scrapbooking purposes.
Supplies:
12x12 White Cardstock - you get 4 autograph pages per piece of cardstock.
Chip Board
Disney Themed Scrapbook Paper
Ribbons
2 Split Rings
Glue Stick
Hole-Punch
Ruler
Rolling Pin
12x12 Paper Trimmer
Heavy Duty Paper Trimmer
Using the Paper Trimmer cut your cardstock to 7 inches first. Cut the 7 x 12 piece into three 4-inch pages. Take the left over piece and cut it to 7 inches and then cut one 4-inch piece. Repeat with each card stock sheet until you get the desired number of pages.
Using a heavy duty paper trimmer cut the Chipboard into two 5x8 pieces. Using the hole-punch and ruler punch holes in the “pages” within 1-inch of the end. Punch coordinating holes in the Chip Board, insuring the holes will allow the split rings to pass through and close.
Take one piece of the chip board and cover it with glue stick. Place your desired piece of paper on the glue side of the chip board and press HARD using the rolling pin. You will need to let this set. Trim off excess paper. Once you have it secured using the holes in the chip board as your guide cut holes in the paper. Repeat with the other piece of chip board. Remember to designate one as the front cover and one as the back cover and decorate accordingly.
Decorate the front of your book. Feed the split rings through the back cover, pages and finally the cover and snap closed. Tie ribbons on the split rings to decorate.
Subscribe to:
Posts (Atom)